
- Details
- Category: News
- Published: 12 August 2017
- Hits: 1695
In 2017, members of the NRI-CSA team attended the Hamlyn Symposium on Medical Robotics as finalists in the Surgical Robotics Competition. Their video submission is included above.
- Details
- Category: News
- Published: 26 January 2017
- Hits: 2495
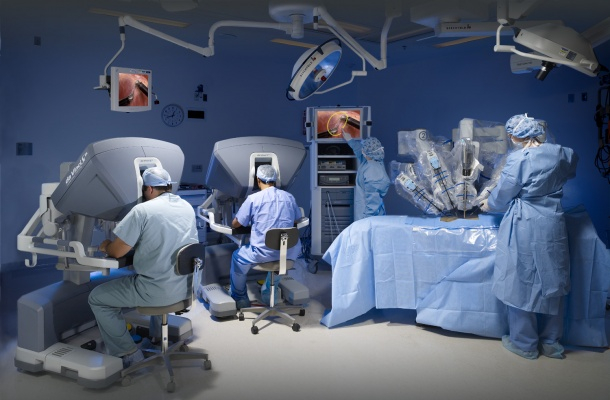
A typical workflow in an operating room with robot-assisted technology is shown in the figure above (source: 2015 Intuitive Surgical, Inc.). Surgeons interact with master consoles while robot manipulators on the patient’s side (remote side) replicate their motions to execute surgical tasks. We use a similar arrangement to develop and test our framework.
Patient Side
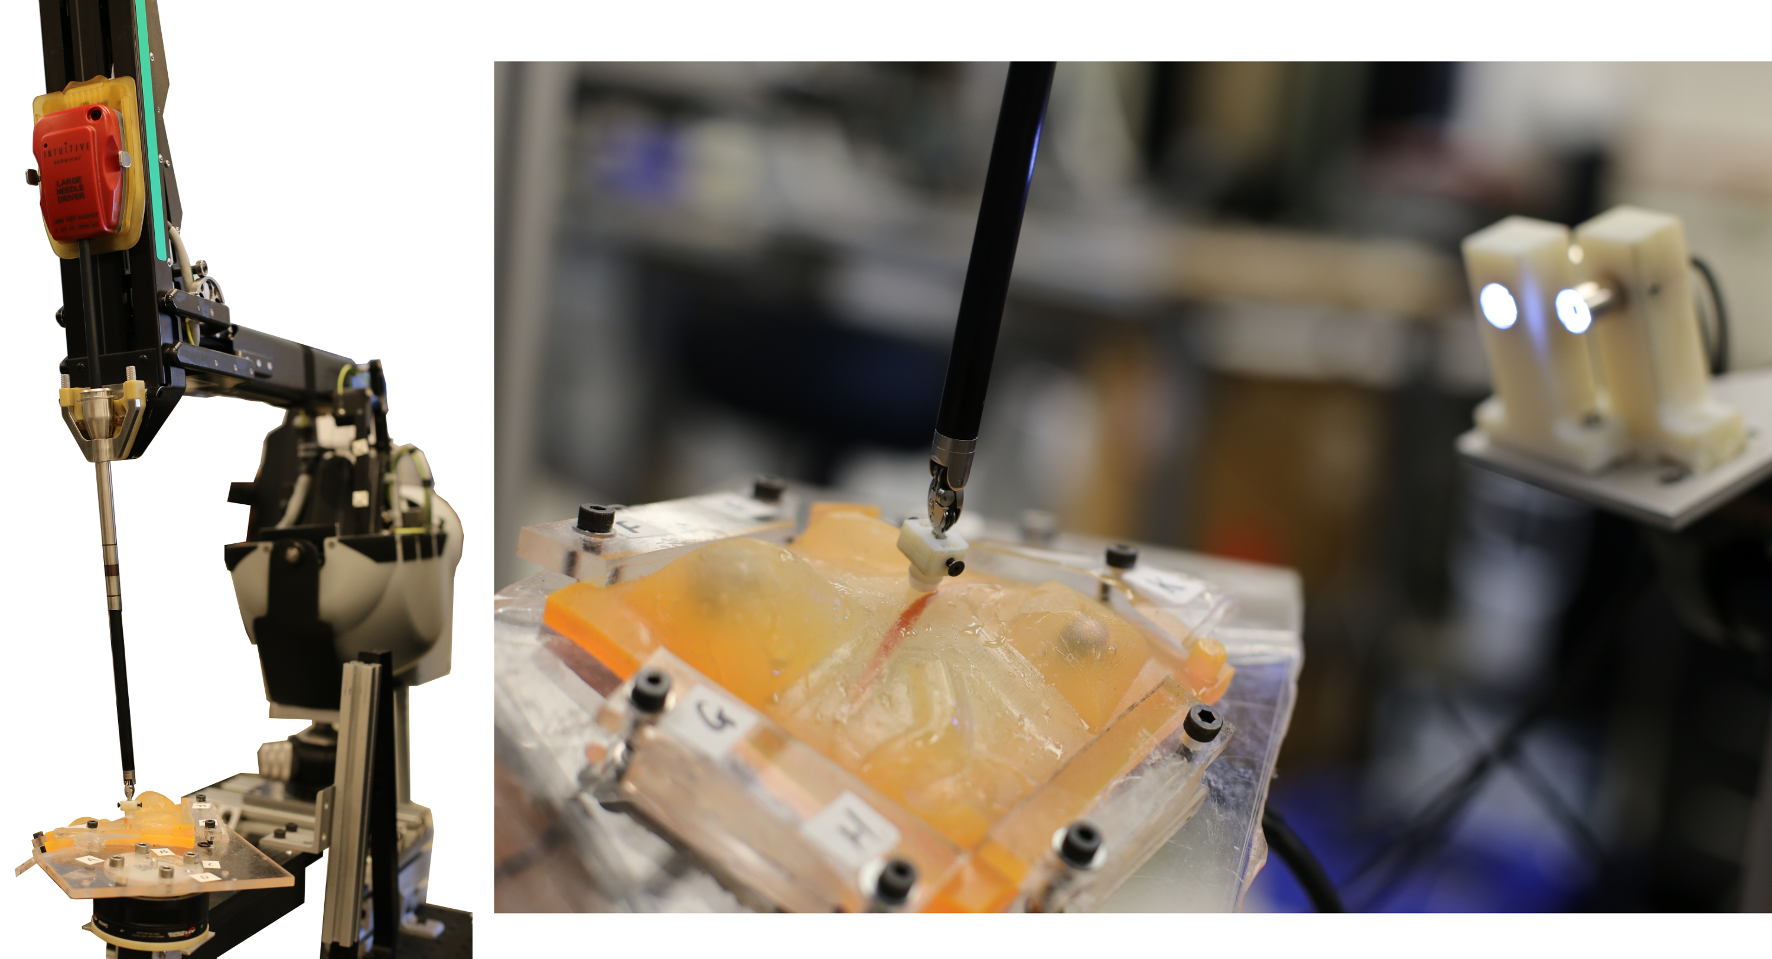
On the patient’s side (remote side) we use a da Vinci Research Kit (dVRK) Patient Side Manipulator (PSM) and a mockup silicone phantom model mounted on a force sensor. We have an inexpensive stereo camera system to provide stereo views to the user, to replace the Endoscopic Camera Manipulator (ECM) that is used in a real surgery.
As we would not be able to place a force sensor underneath an organ in a real surgical setting, the force sensor setup is not realistic, however, we are able to answer more fundamental research questions by using it to give us full information about the contact forces between the robot and the anatomy. In the future, this can be replaced by force sensing capabilities of the robot itself: there are promising researcher efforts by many, including our group, to provide force-sensing capabilities on surgical robots.
Surgeon (user) Console
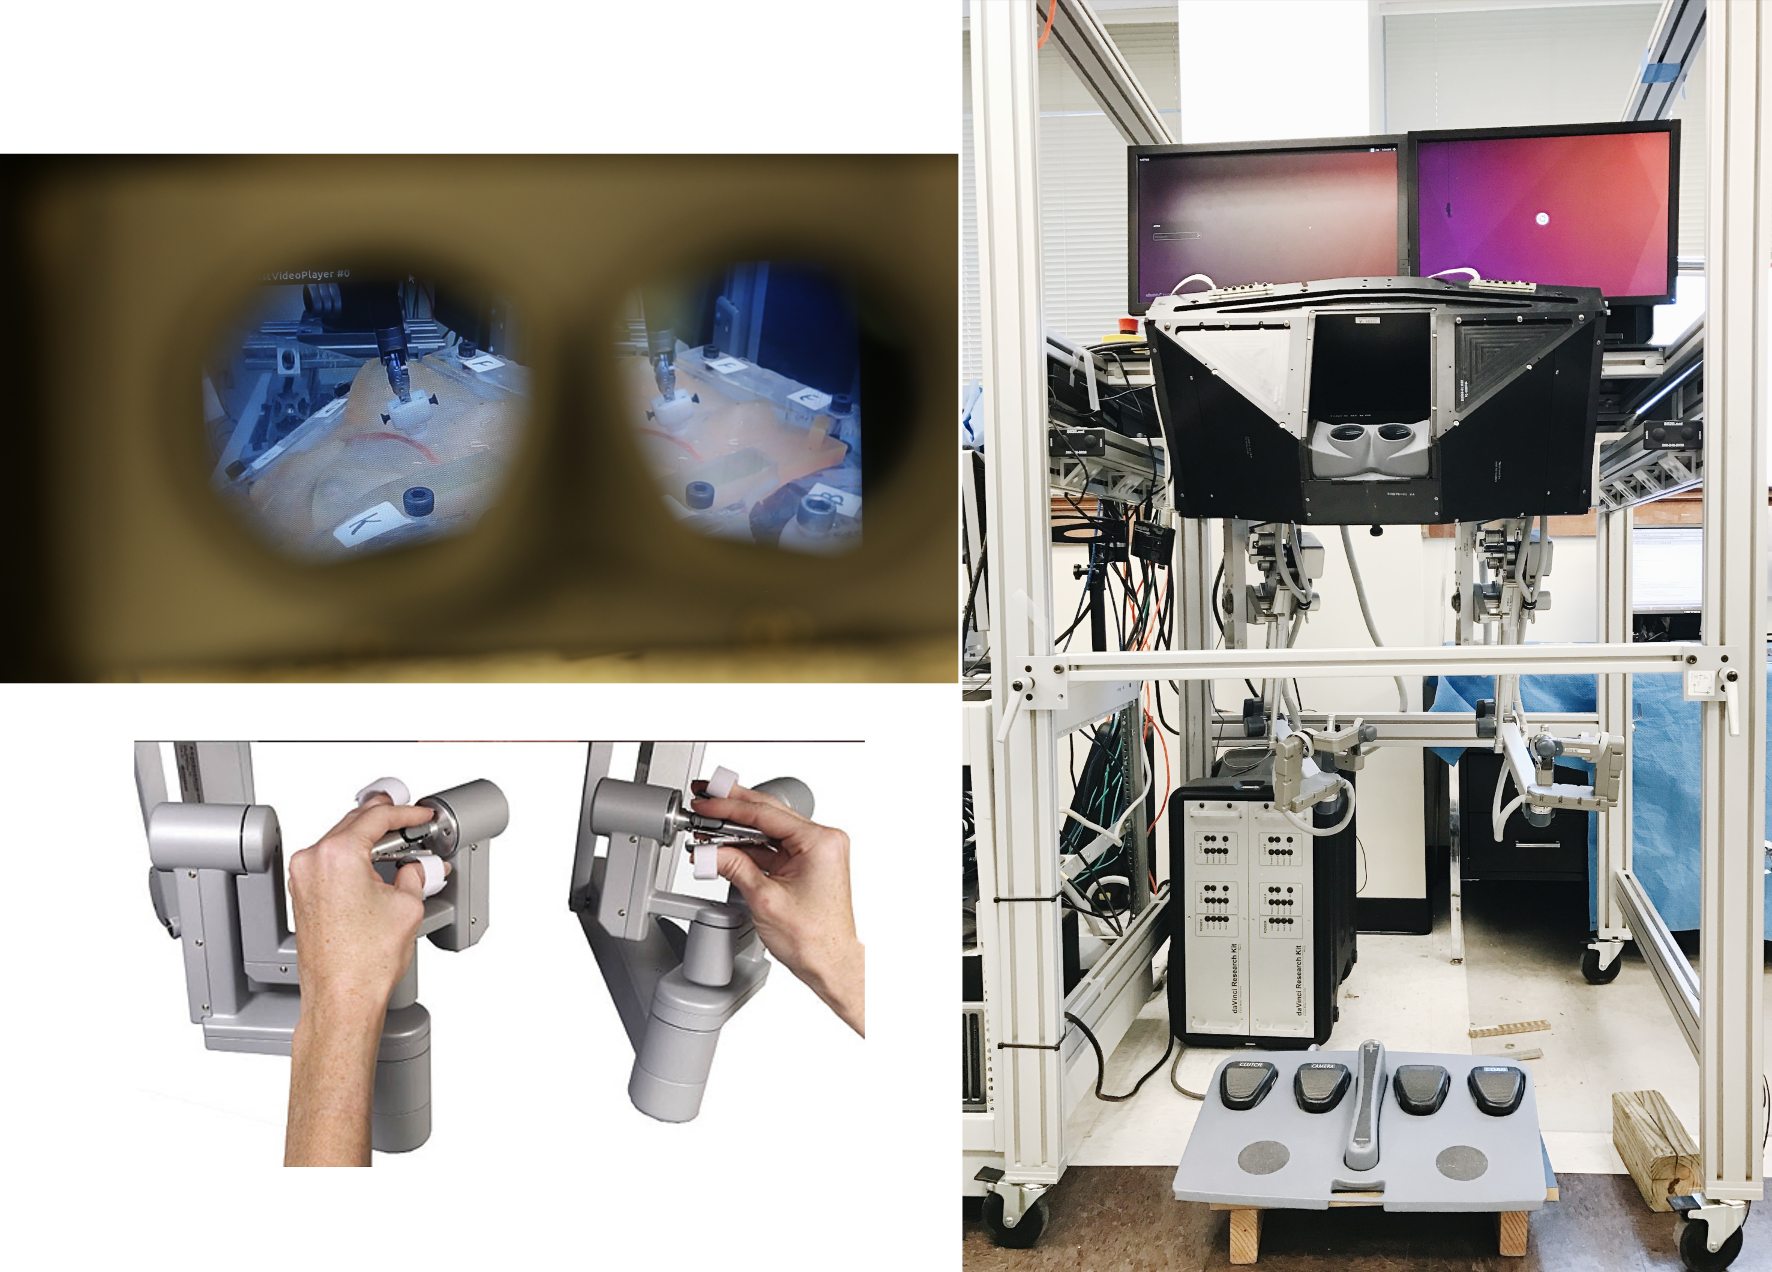
For the surgeon (user) console side, we use a da Vinci Research Kit (dVRK) Master Tool Manipulator (MTM), including two master arms (only one is used for this demo) and a stereo viewer system that projects the two video feeds from the remote side. A standard foot pedal system is used for control.
A sense of touch & intelligent robot assistance
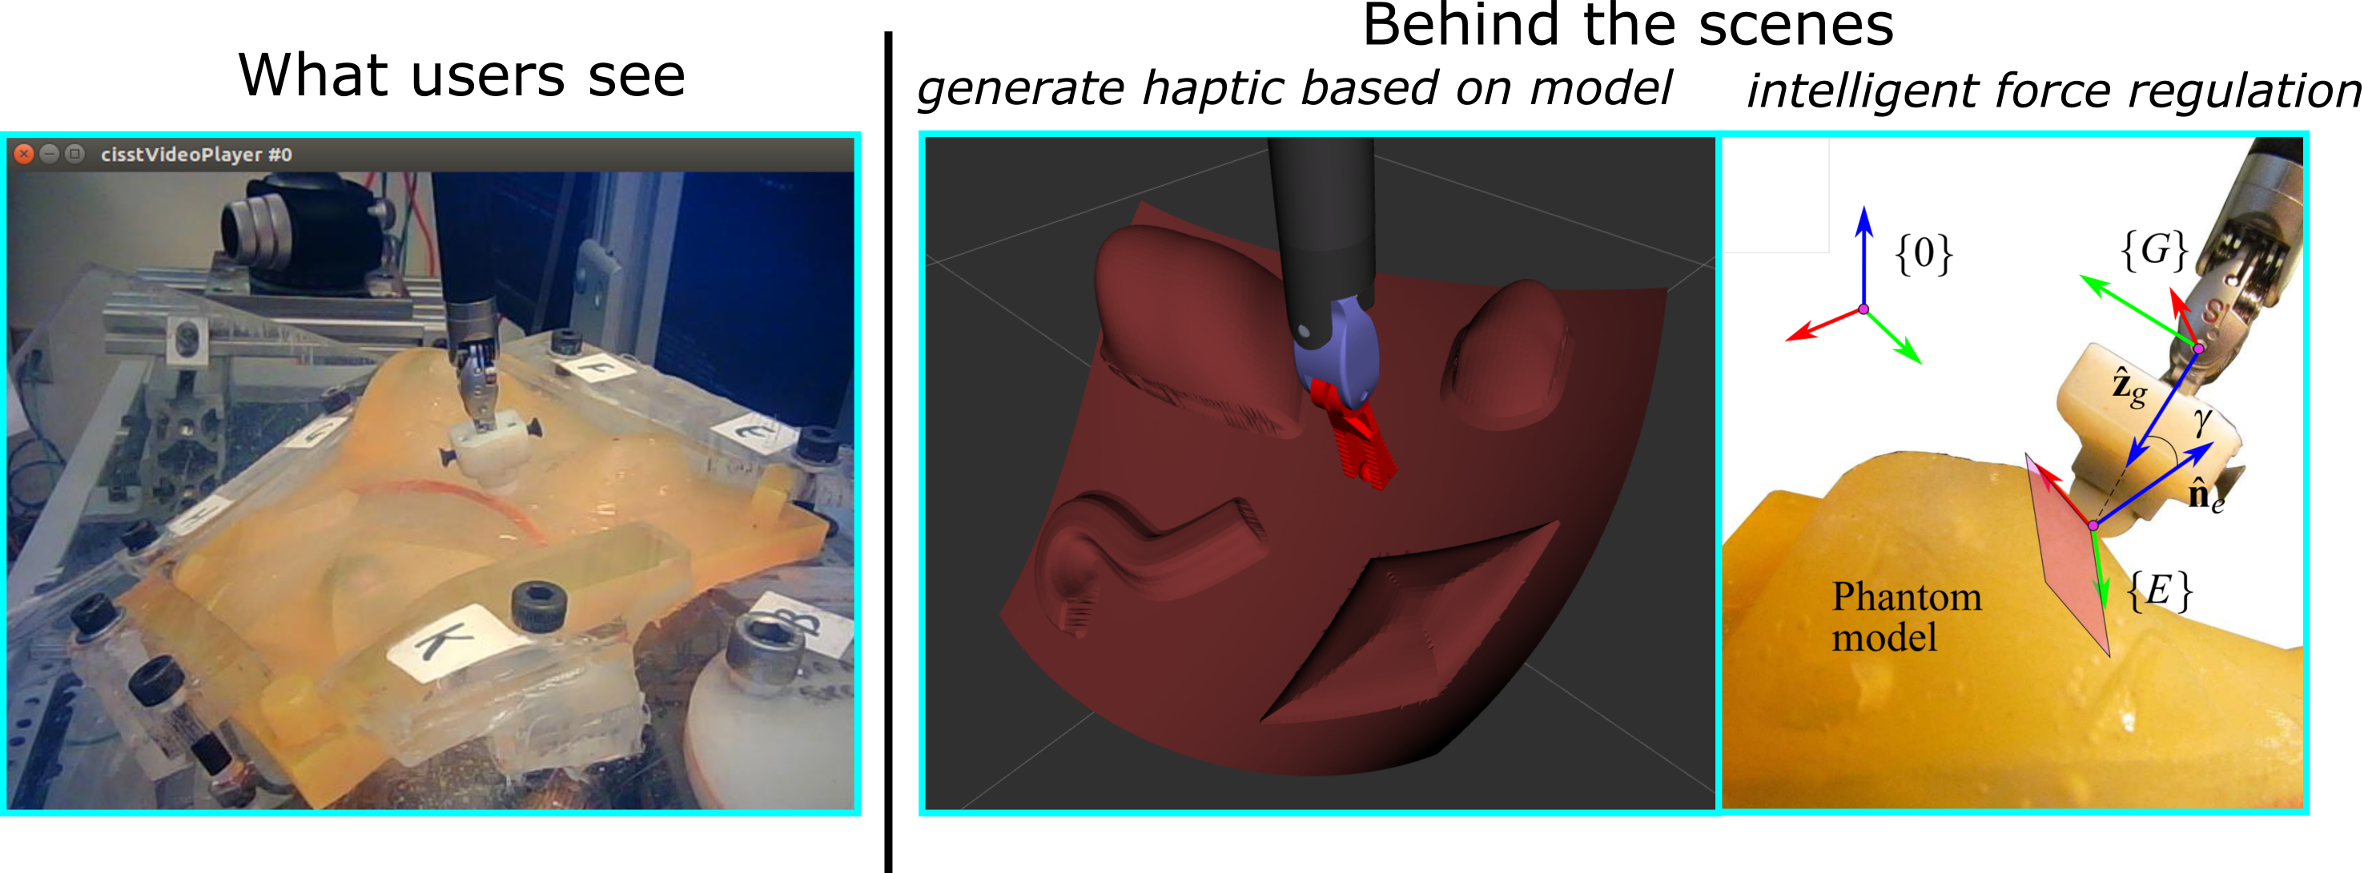
Surgeons (users) in this demo can see “inside” the anatomy through stereo video feeds from the remote side. But to give a sense of touch, a more complicated method is required. Simply sending the readings from the force sensor will be too noisy and will add a lag between the user movements and the force feedback. To combat these problems, a model representing the environment is updated behind the scenes and that model is used to generate haptic rendering forces based on a simple spring force model. Additionally, without any input by the user, the patient side robot manipulator regulates the interaction force with the environment, relying on its own hybrid force motion controller.
Demo in VISE Symposium

We believe the best way to improve a system is to ask different surgeons and users to try the system and get valuable feedback from them. The 5th Annual Surgery, Intervention, and Engineering Symposium sponsored by VISE was a great opportunity for us to do just that. We received a great deal of positive feedback from the users and also we found places where we can improve the system in our ongoing research plan.
Lab tour & demo for Harpeth Hall Winterim 2017

One very important mission of our research is to connect to and inspire younger generations. As the culmination of a 3-week “Winterim” teaching program at Harpeth Hall high school on medical robotics, lab members showed a group of 10 students around the ARMA lab. The lab tour included this demo along with other examples of what we are working on. These 9th and 10th graders were able to feel how the robot reacts to their commands and get a more physical understanding of what robots look like and how they are developed.
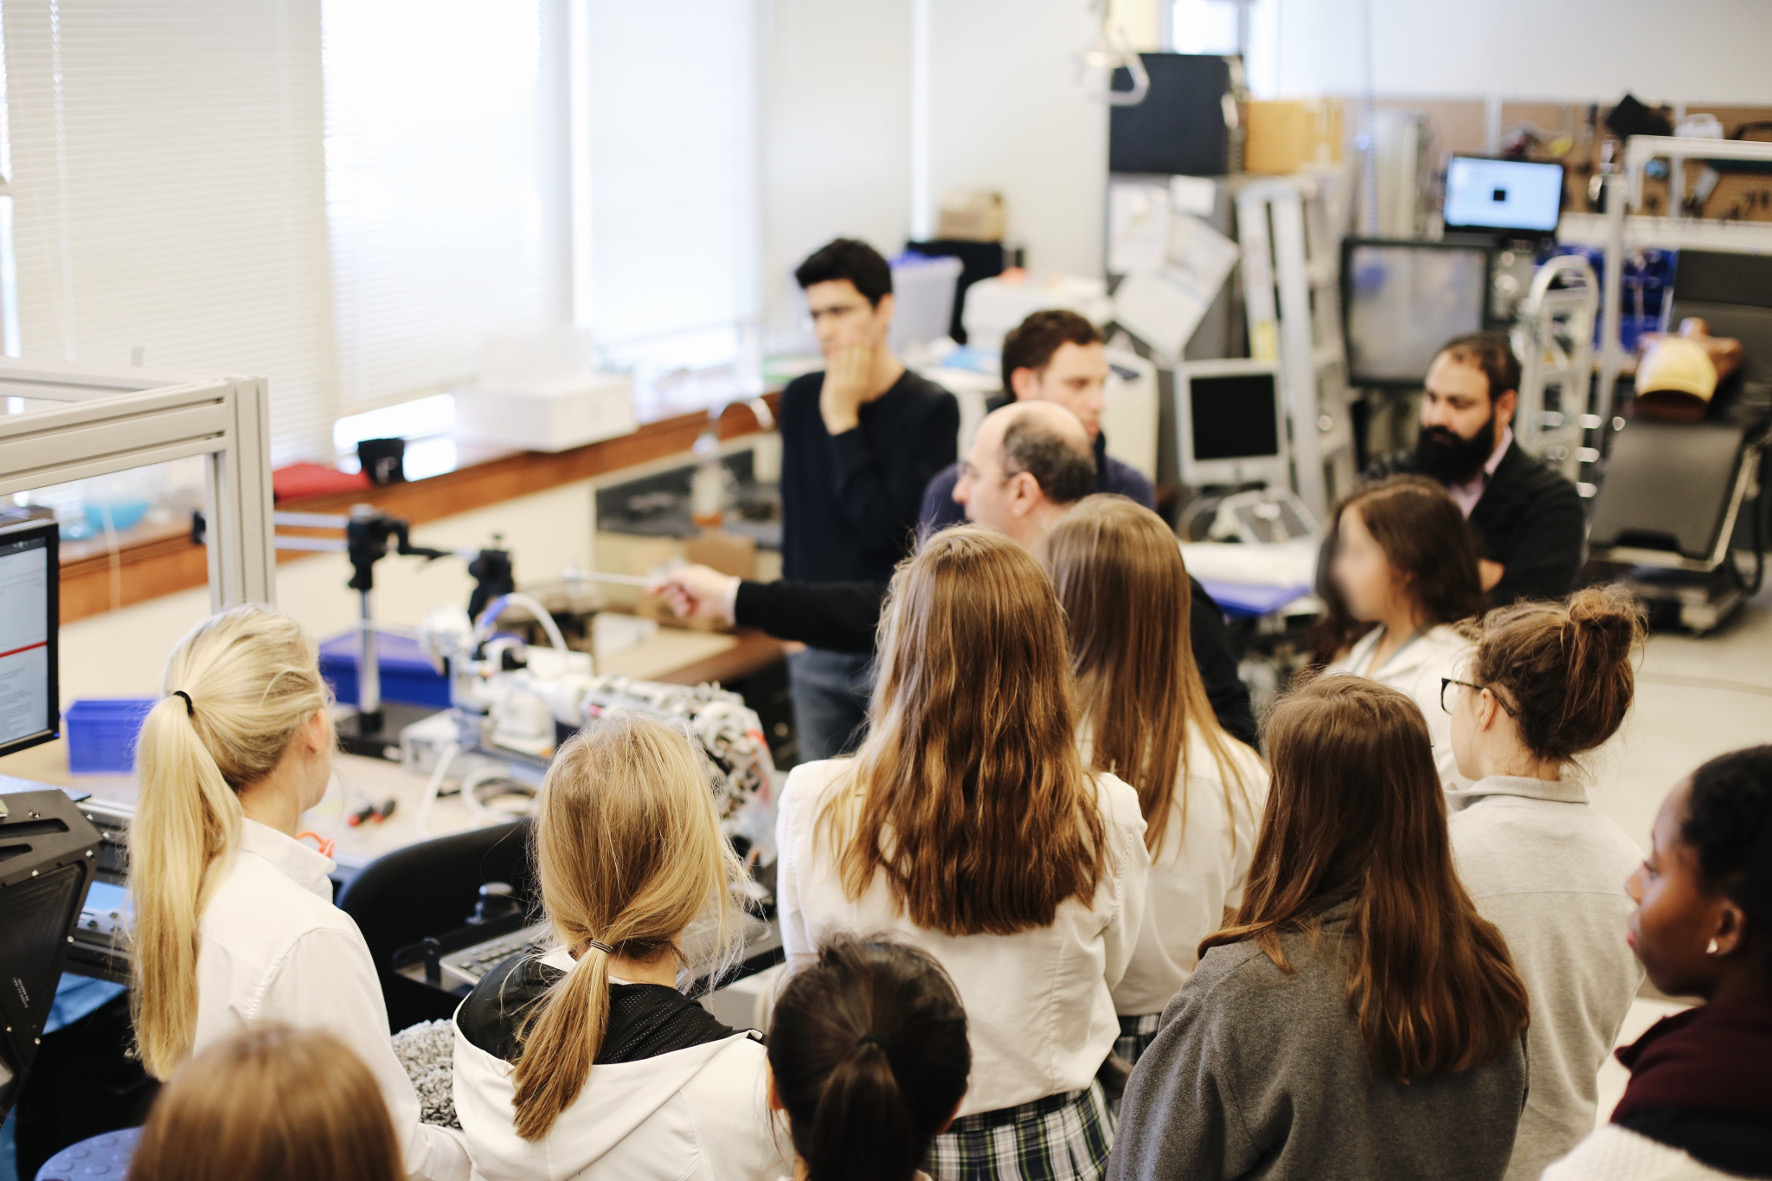
Approximately half of the class was thinking of a career in the fields of biomedical engineering or medicine. While we do not expect them to understand all the engineering details of how we create these demos, but we hope, that one day when some of these students become doctors, the features that we are building today will become commonly found in surgical suites across the globe.
This work has been accepted by Journal of Mechanisms and Robotics and will be shown in coming issues. The accepted manuscript can be found here.
- Details
- Category: News
- Published: 02 July 2014
- Hits: 1968
Networking:
- JHU: Connect LCSR-QLA PC to router, address of LCSR-QLA should be 192.168.1.5
- JHU: IP of router is 192.168.1.1, login is admin, password is Fe....
- Router is configure to forward TCP and UDP to 192.168.1.5 for port range 10000-10500
- JHU: IP public router address is 128.220.72.28 - not registered in DNS
- VU: IP address for Linux gateway box is on eth2 129.59.78.75 (DNS davinci-ubuntu1204.vuse.vanderbilt.edu)
- VU: Linux box address is 192.168.1.104 on LAN
- VU: xPC address 192.168.1.201 on LAN
- VU: linux for testing Stereo: 192.168.1.105 on LAN
iptables:
# allow port forwarding
sudo iptables -A FORWARD -i eth2 -j ACCEPT
sudo iptables -A FORWARD -i eth3 -j ACCEPT
sudo echo '1' > /proc/sys/net/ipv4/conf/eth2/forwarding
sudo echo '1' > /proc/sys/net/ipv4/conf/eth3/forwarding
# cleanup all existing rules
sudo iptables -F
sudo iptables -X
sudo iptables -t nat -F
sudo iptables -t nat -X
sudo iptables -t mangle -F
sudo iptables -t mangle -X
sudo iptables -P INPUT ACCEPT
sudo iptables -P FORWARD ACCEPT
sudo iptables -P OUTPUT ACCEPT
# from JHU
sudo iptables -t nat -A PREROUTING -p udp -s 128.220.72.28 --dport 10005 --j DNAT --to 192.168.1.201:10005
# to JHU
sudo iptables -t nat -A PREROUTING -p udp -s 192.168.1.201 --dport 10005 --j DNAT --to 128.220.72.28:10005
# from JHU
sudo iptables -t nat -A PREROUTING -p udp -s 128.220.72.28 --dport 10004 --j DNAT --to 192.168.1.201:10004
# to JHU
sudo iptables -t nat -A PREROUTING -p udp -s 192.168.1.201 --dport 10004 --j DNAT --to 128.220.72.28:10004
sudo iptables -t nat -A POSTROUTING -j MASQUERADE
With these rules we can test using:
VU: nc -u -l 10005 JHU: nc -u 129.59.78.75 10005
VU: nc -u 192.168.1.104 10005 JHU: nc -u -l 10005
To see rules, sudo iptables -L -t nat
Video:
- VU starts the cisstCameraViewer with port 10001
- JHU starts cisstVideoPlayer -c 2 -i 129.59.78.75 -p 10001
- Details
- Category: News
- Published: 03 January 2012
- Hits: 1569
Your home page is set to display the four most recent articles from the blog category in a column. Then there are links to the 4 articles before those. You can change those numbers by editing the content options settings in the blog tab in your site administrator. There is a link to your site administrator in the top menu.
If you want to have your blog post broken into two parts, an introduction and then a full length separate page, use the Read More button to insert a break.
